Spice Up Your 4th of July Spread!
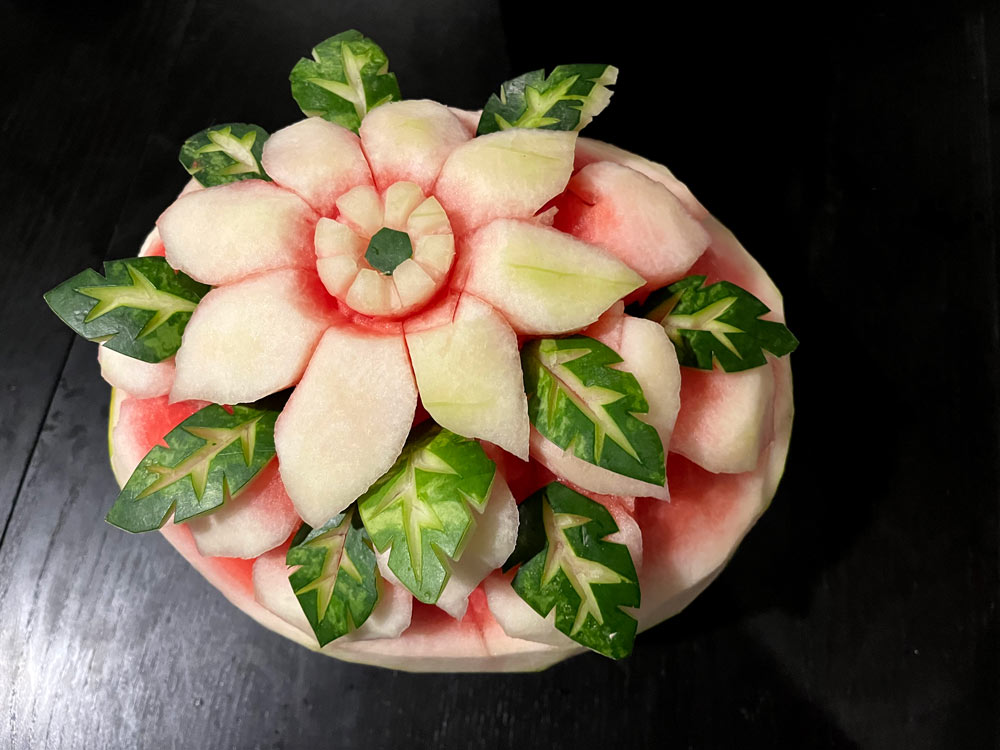
Independence day is always a huge celebration across the country, but especially in Texas, the land of backyard barbecues, cowboy hats, and fireworks. Spending a beautiful day outside with your friends and family can be one of the most rewarding experiences, second of course to impressing those groups of people with your 4th of July spread! This year why not spice things up a little bit with an unexpected mix of Texas culture and elegance that is sure to have your guests wondering how you pulled it off. For appetizers give our jalapeno poppers and fried pickles a try to add some Texas flair to your event. Tired of having the same burgers and hot dogs every year? Try setting out an upscale slider station that will have your guests begging for your recipe! For a real spectacle you can even carve your own edible arrangement out of a watermelon, and it isn’t as hard as you might think. If you’re looking for ideas to vary up your 4th of July platter this year read on!
Set Up a Slider Station
Ingredients:
- 1 Pound Ground Beef
- 1 Egg
- 2 Tsp Worcestershire Sauce
- 2 Heaping Tbsp Panko Bread Crumbs
- 1 Tsp Salt or Seasoning Blend
- ½ Tsp Garlic Powder
- ½ Tsp Paprika
- ½ Tsp Black Pepper
- ½ Tsp Thyme
- ¼ Tsp Chili Powder


Step 1
Roughly break up the ground beef in a mixing bowl distributing the spices evenly across the surface of the meat. Add the worcestershire sauce, breadcrumbs and egg (which will help the patties bind together).
Step 2
Mix the ingredients together with a fork or knead it with your hands until evenly incorporated and it forms a singular mass. Divide the meat equally in 1/8th pound pieces rolling them into small balls. (Be sure to wash your hands after handling raw meat).


Step 3
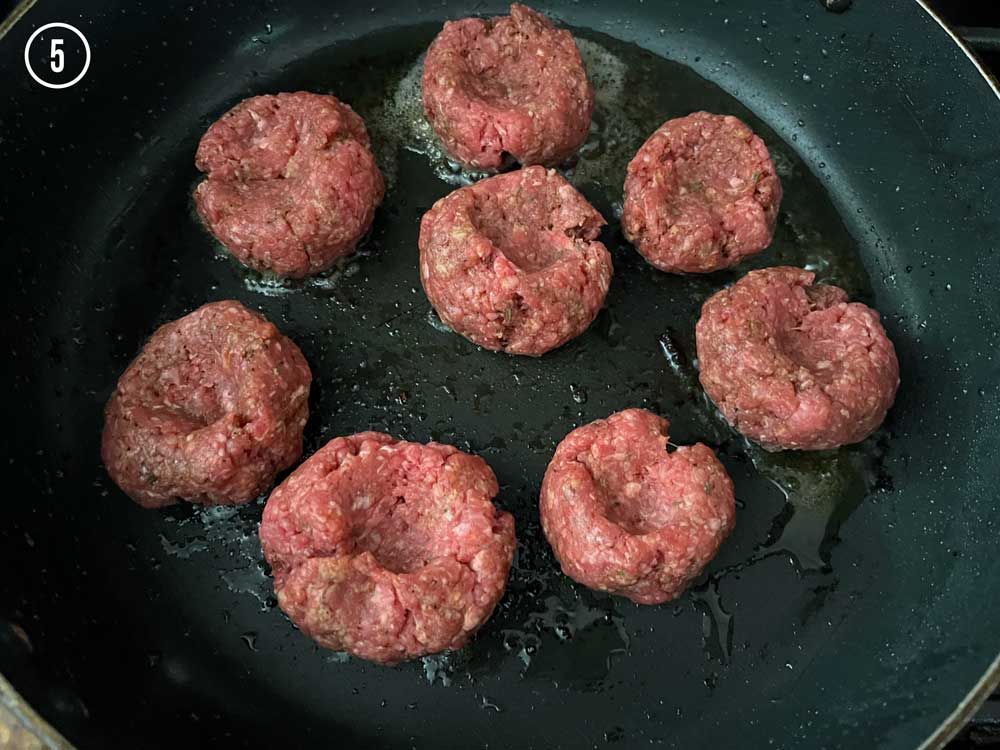
Let a large flat bottomed pan get searing hot over medium high heat. Flatten one side of each meat ball, dimpling the other with your thumb to create a crater-like hole in the center. (This will help the shape of your patties stay flat and evenly cooked instead of shrinking up into thick pucks).
Step 4
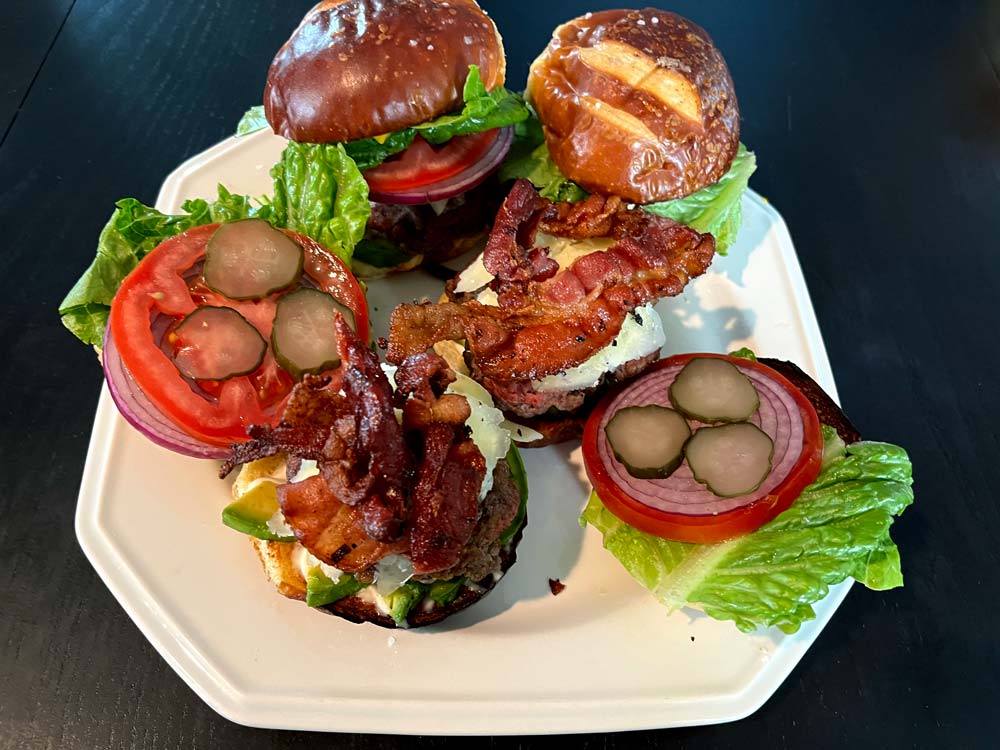
Before you begin cooking the patties for your sliders, prepare any additional toppings for your slider station. For the classic combo, break up larger leaves of lettuce to fit, thinly slice circles of red onions, tomatoes, and pickles setting them aside. For a couple extra fixing options, try thinly sliced avocado, jalapenos, caramelized onions, sharp cheddar cheese, or even bacon. (If using tomatoes, lay out your slices on a cutting board salting the surface. Let them rest while you prepare the meat which will elevate their flavor and reduce excess moisture. You may not know it but salting your tomatoes is a necessary step).
Step 5
Lightly oil your pan and place the patties flat side down, moving them as little as possible during this step to achieve a nice sear. Cook for 6-8 minutes on the first side until nicely charred on the bottom.
Step 6
Flip the patties, flattening them as much as possible using the back of a spatula without destroying their construction. Cook for an additional 4-5 minutes until a slight sear is achieved and the red around the edges has almost completely faded. If you like your burgers cooked medium promptly transfer them onto a sheet tray lined with aluminum foil to rest.
Step 7
Toast your choice of slider buns and set them out with your fixings in a slider station for your guests to assemble to their liking. If you can find pretzel buns, I would definitely recommend trying them out. A good pretzel bun will truly take your burgers to the next level.
Three Cheese Jalapeno Poppers
Ingredients:
- 6-8 Fresh Jalapenos
- 8 Oz Cream Cheese (Softened)
- 4 Oz Sharp Cheddar (Grated)
- 4 Oz Fresh Mozzarella
- 1 Cup Flour
- 1 Cup Panko Bread Crumbs
- 2 Eggs
- 1 Tsp Salt or Seasoning Blend (Divided)
- 1 Tsp Garlic Powder (Divided)
- 1 Tsp Black Pepper (Divided)
- 1 Tsp Paprika (Divided)
- 1 Tsp Thyme (Divided)
Step 1
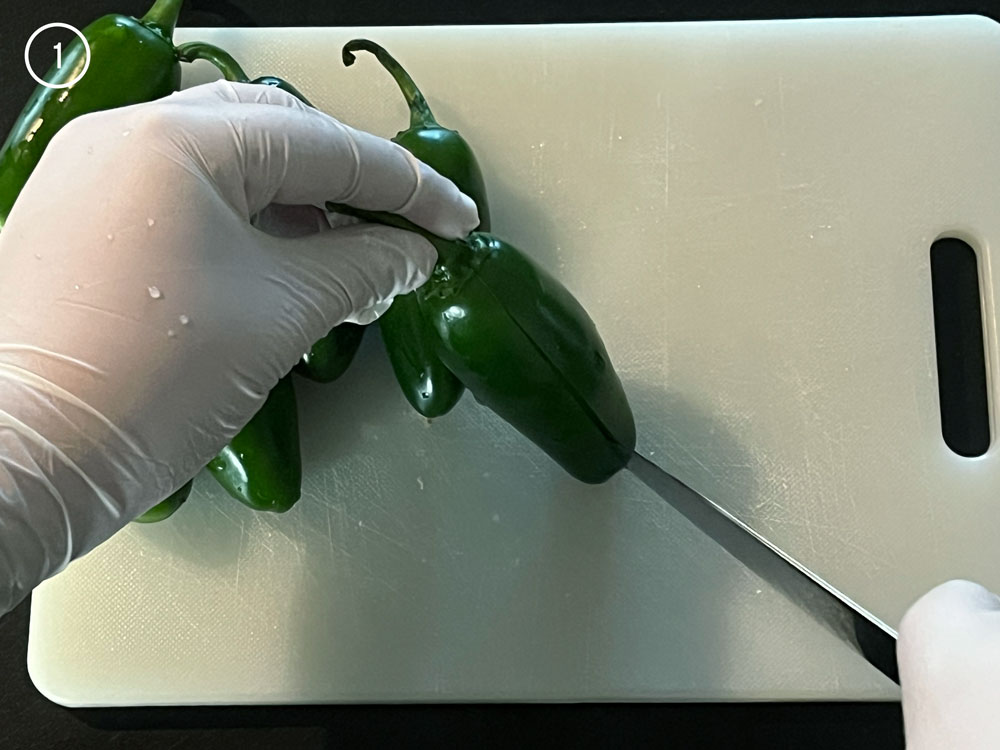
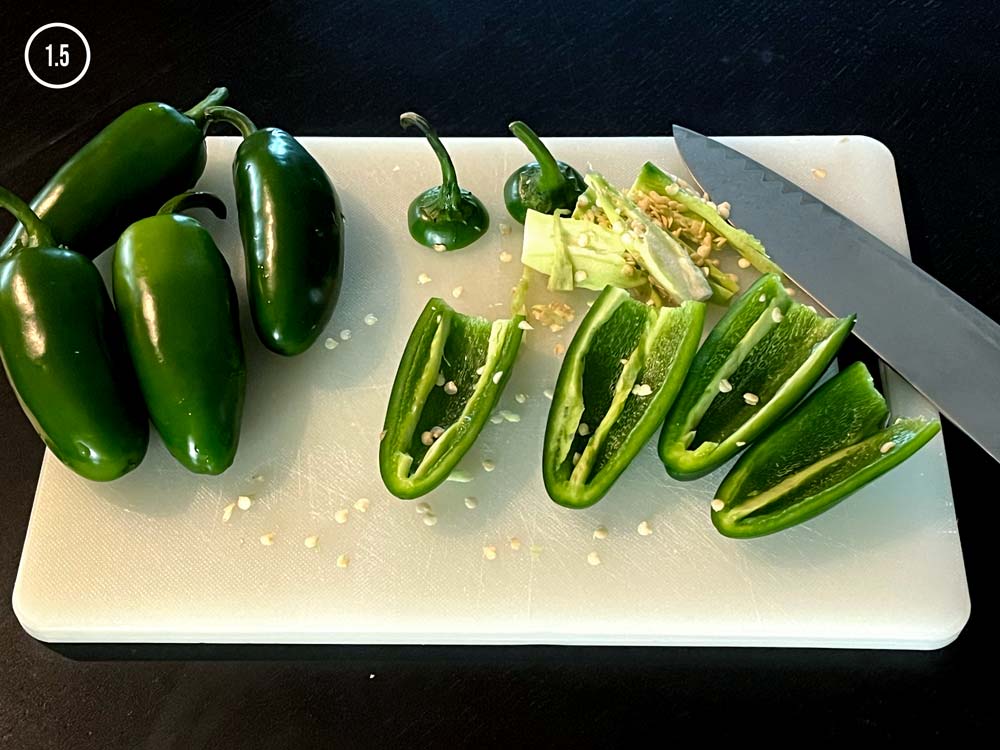
Using a pair of disposable gloves, slice each jalapeno in half and remove the seeds.
Step 2
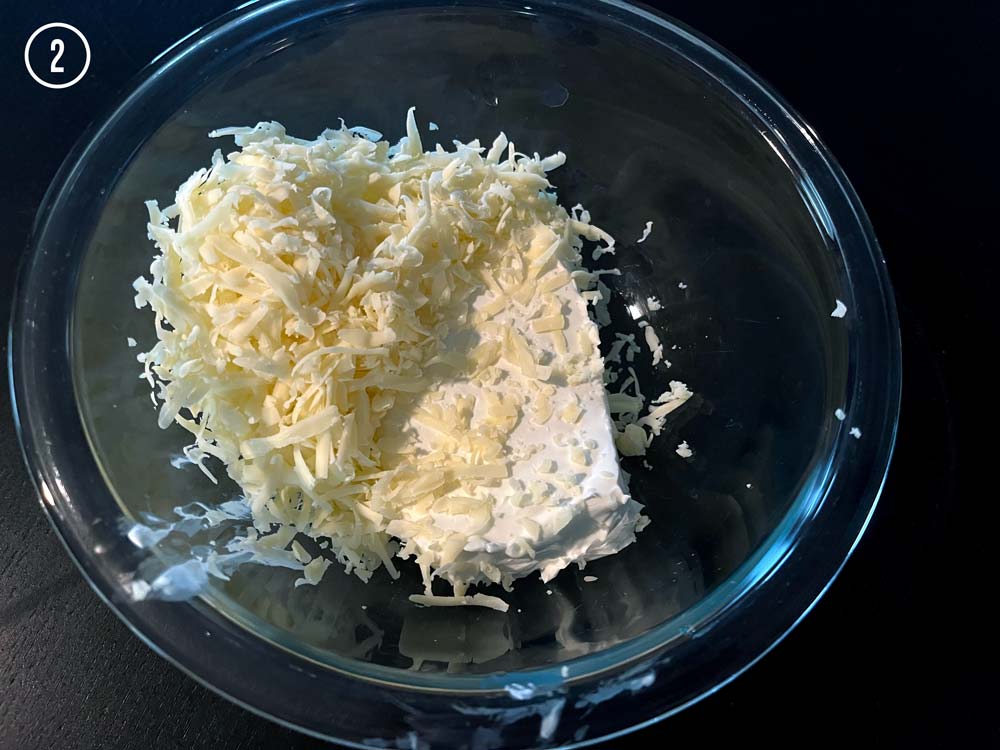
In a small mixing bowl, combine the softened cream cheese with the grated cheddar setting aside. Also cut the fresh mozzarella into skinny strips about the length of your jalapenos.
Step 3
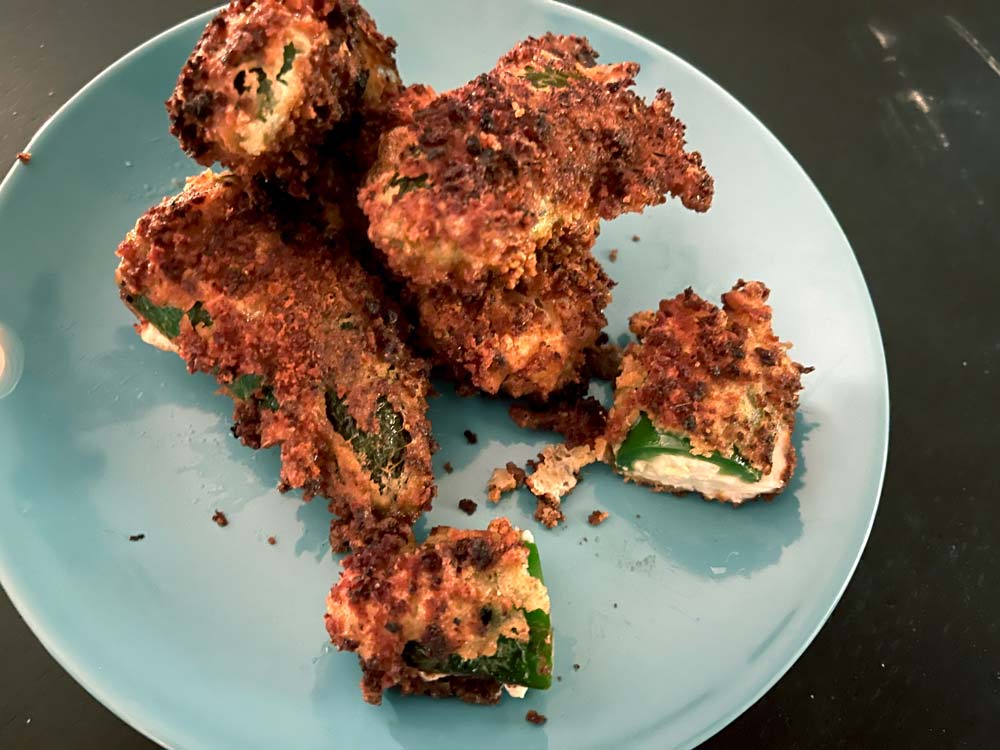
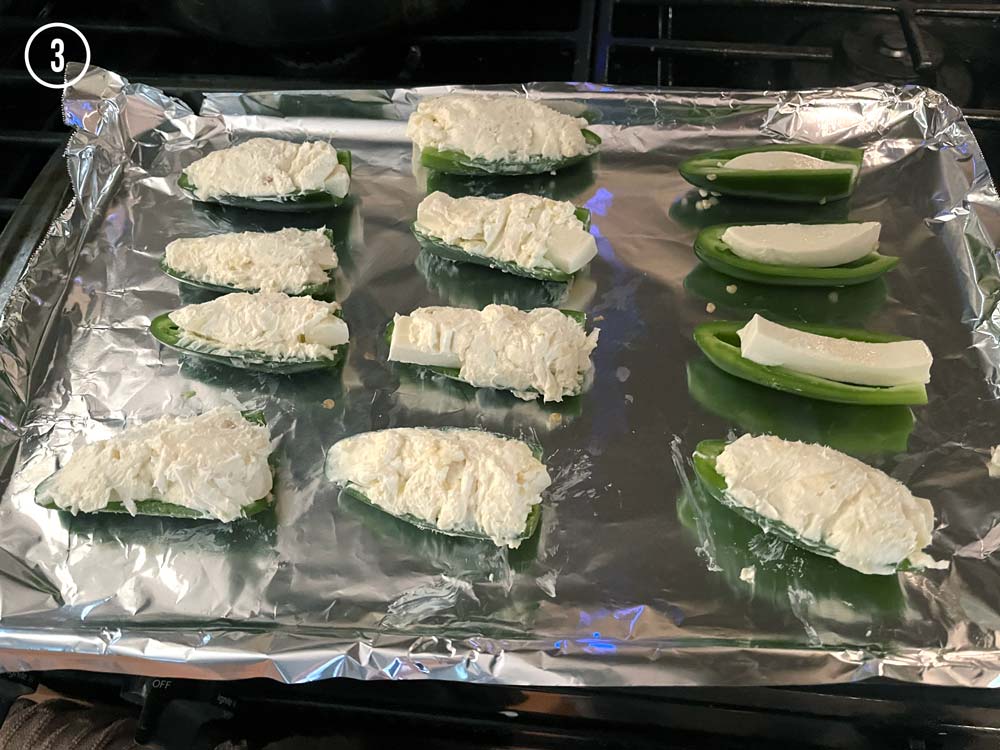
Place a strip of mozzarella in each pepper half, filling in the gaps with a scoop of the cream cheese mixture, and setting them out on a tray.
Step 4
Place the tray of cheese filled peppers in the freezer for about an hour to ensure they are frozen solid. (This is important so that the cheese does not leak out during the frying process, ruining the dish and creating a huge mess).
Step 5
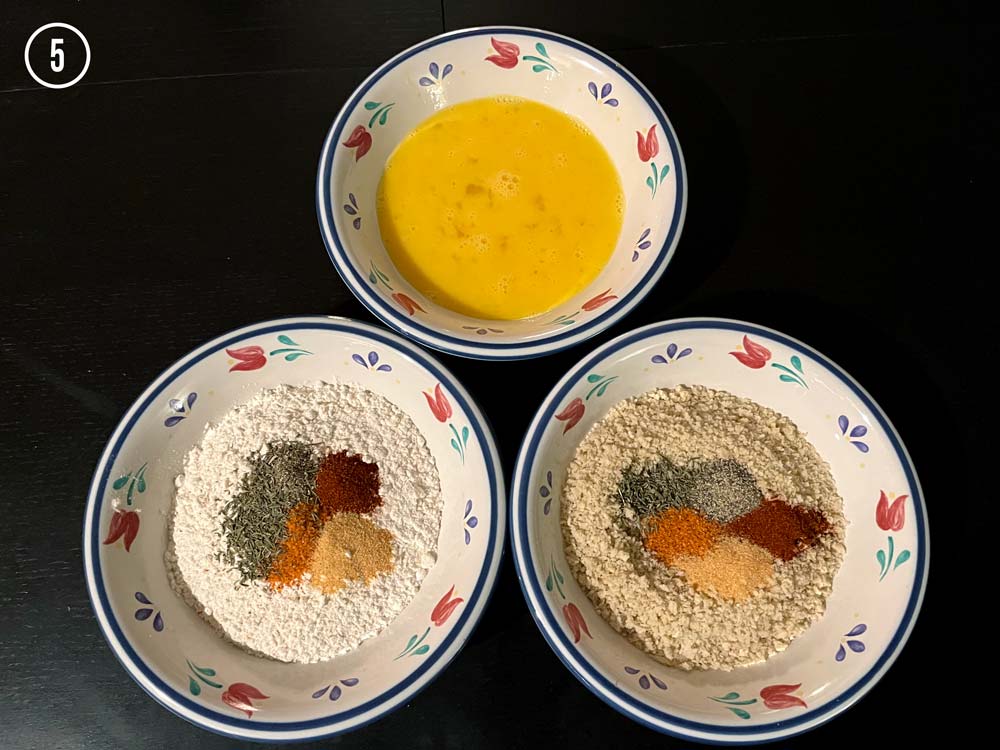
While the jalapenos are freezing, build your dredge assembly line by whisking half of the spices (½ tsp each) into the flour in one bowl. Mix the other half of the spices in with the panko in a separate bowl, and finally in a third bowl scramble 2 eggs together.
Step 6
Transfer the frozen peppers between each bowl starting by coating them in the flour mixture, followed by the egg, and finally the panko.
Step 7
Heat about an inch of high smoke point cooking oil in a large pan over medium high heat until it is very hot (about 360 degrees) then add in the coated jalapenos. (When placing the peppers into hot oil, first break the surface tension with one end of the pepper and let it fall away from you to avoid splashing hot oil on yourself).
Step 8
Cook the peppers for about 10 minutes until golden brown, turning them over frequently to prevent burning. Serve them while they are still hot!
Crispy Fried Pickles
Ingredients:
- 30-40 Pickle Slices
- 1 Cup Flour
- 1 Tsp Salt or Seasoning Blend (Divided)
- ½ Tsp Garlic Powder
- ½ Tsp Black Pepper
- ½ Tsp Paprika
- ½ Tsp Thyme


Step 1
Set your sliced pickles on a work surface and pad them with a paper towel to absorb some of the excess moisture.
Step 2
Make your dredge by whisking together the flour and spices. (For even crispier fried pickles, you can use the same coating process as the jalapeno poppers using eggs and panko as well).

Step 3
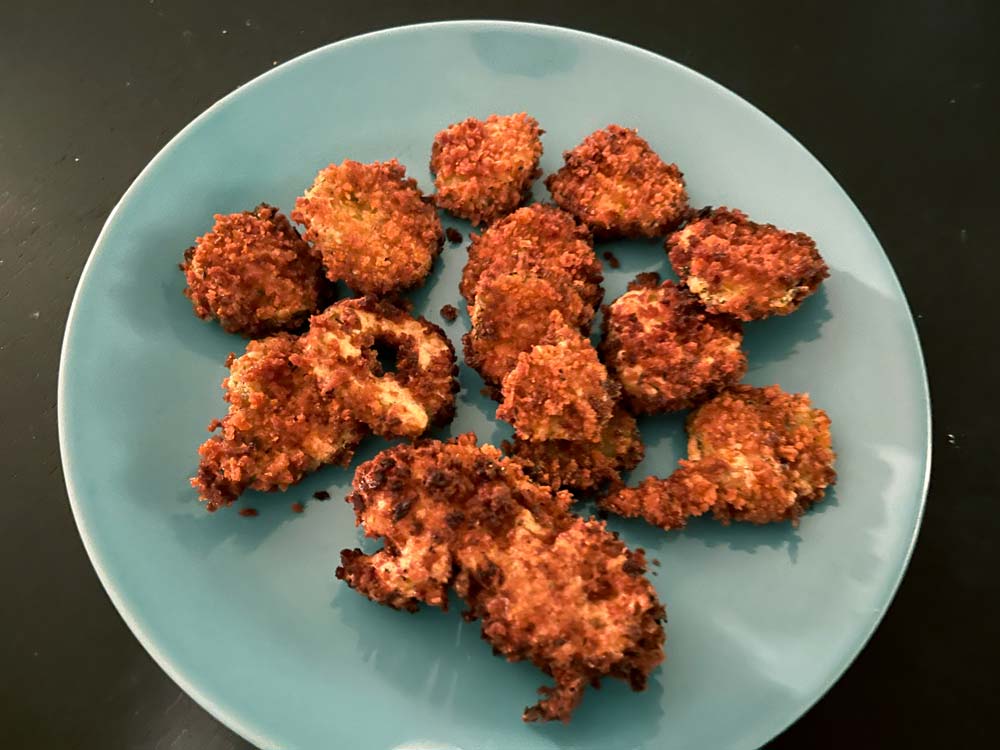
Heat about 1 inch of oil in a pan until hot (About 360 degrees), coat the pickle slices in your dredge mixture and fry them in batches of 10-15 for about 5 minutes until crispy and golden brown.
Step 4
Serve hot with a spicy mayo for dipping!

Easy Fruit Carving
Step 1
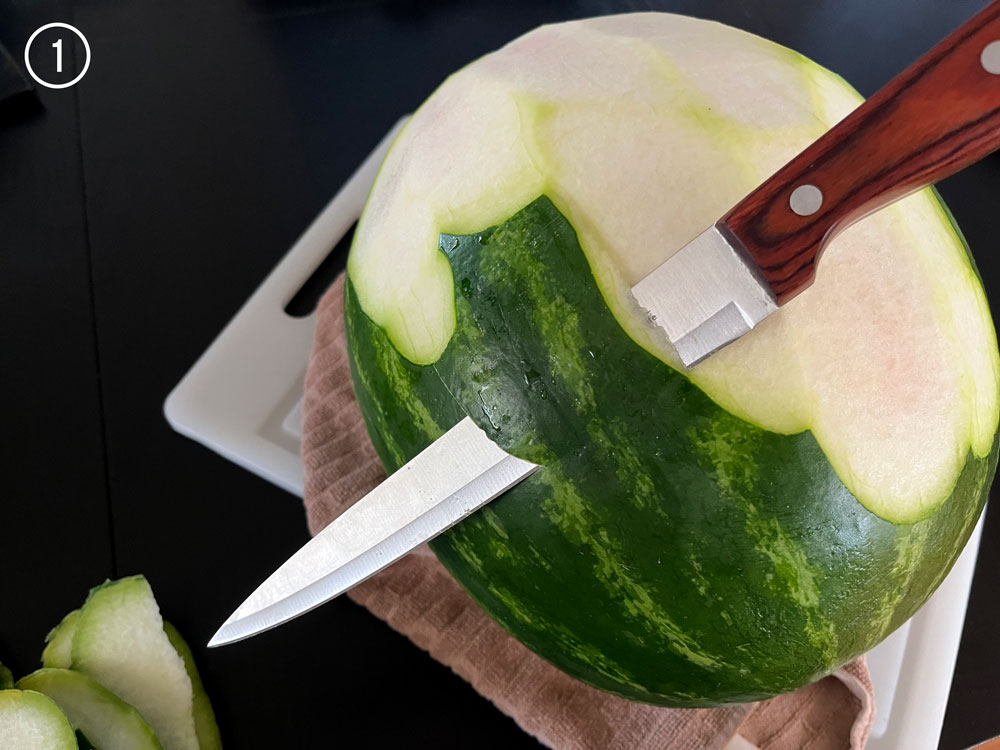
Start by using a longer carving knife to remove the thin layer of green skin on one half of the watermelon. Try and do this in the largest strips you can manage, and don’t throw the skins out! We will use these later on to create leaves.(To keep the melon from sliding around it works well to place a dish towel underneath it during this process).
Step 2
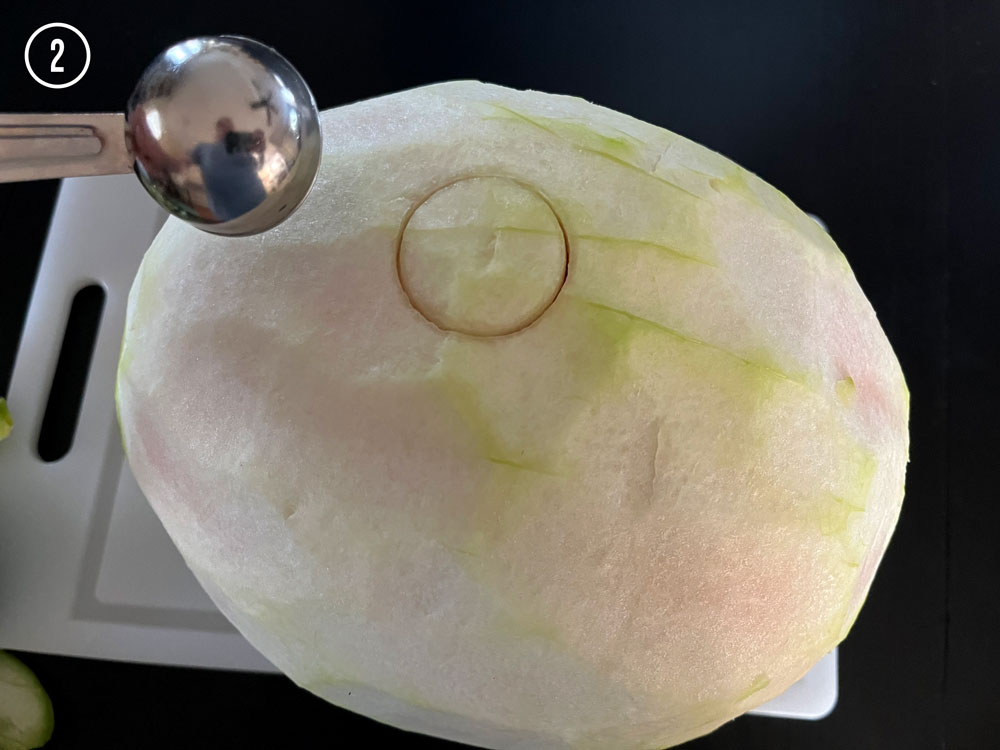
Once you have removed the green rind from one half of the melon, make sure to even out any hard lines that appear on the surface from the peeling process (you want it to be as smooth and round as possible). Choose a point close to the center and using a tablespoon measure, press it into the fruit to create a perfect circle.
Step 3
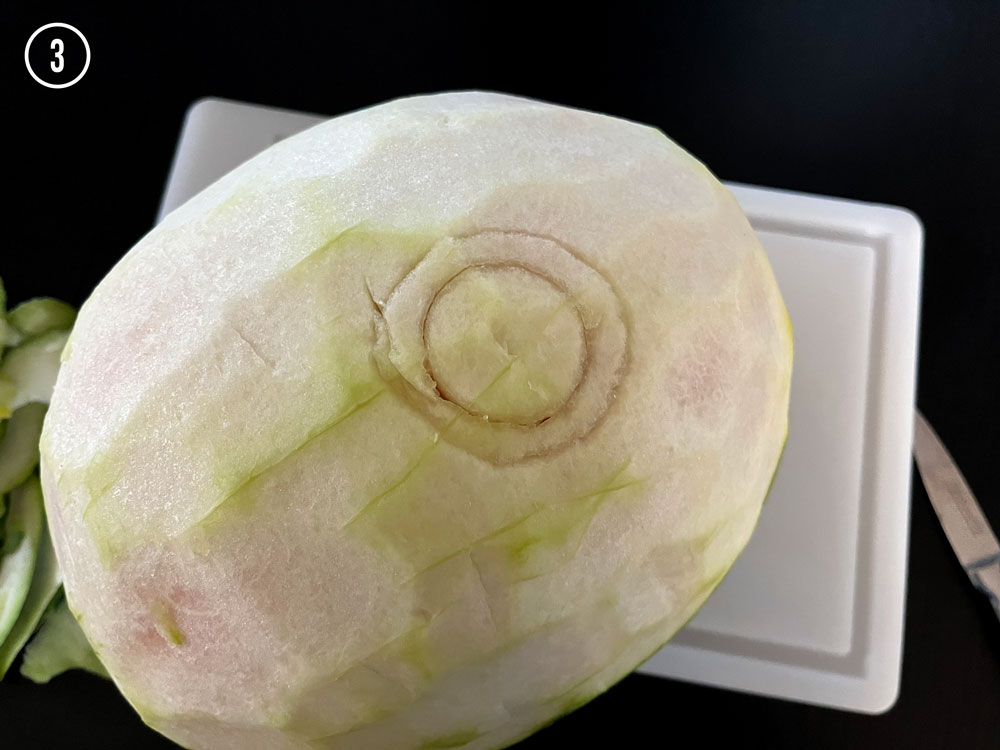
Now with a paring knife held at an angle, carefully cut a ring around the starting circle and remove the outer ring. Using a 1/2 tsp measure, scoop out the center of the circle.
Step 4
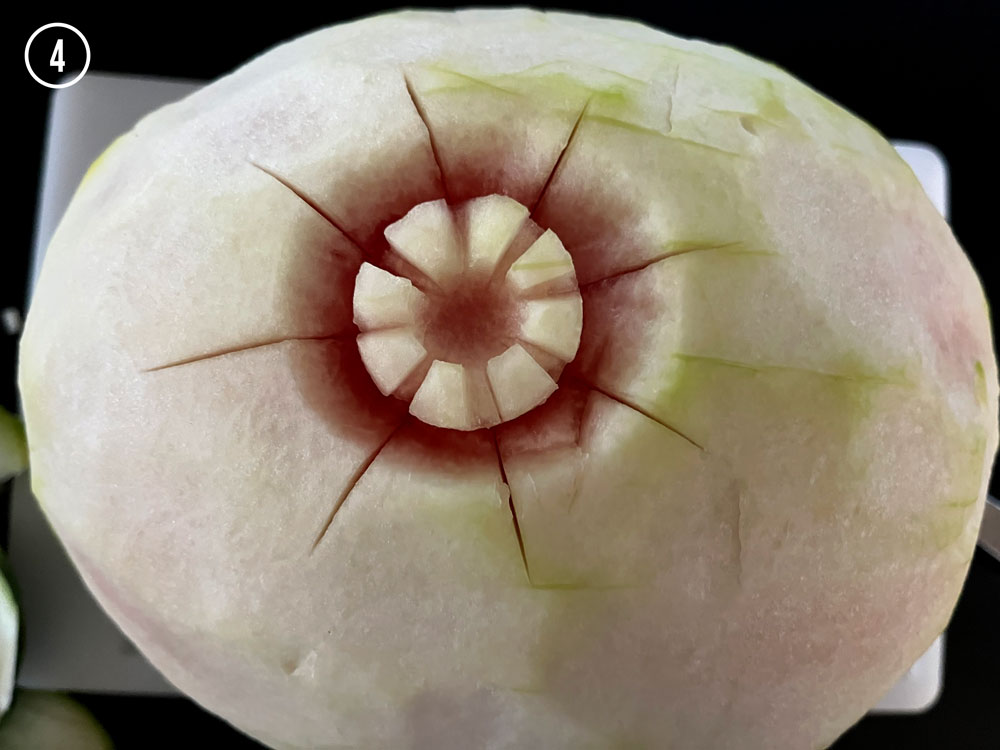
Divide the edges of the circle into eight equal parts by shallowly cutting across the center and making sure not to cut all the way through. Do this again slightly offset from the first time and remove the small chunks to create a sun-like pattern.
Step 5
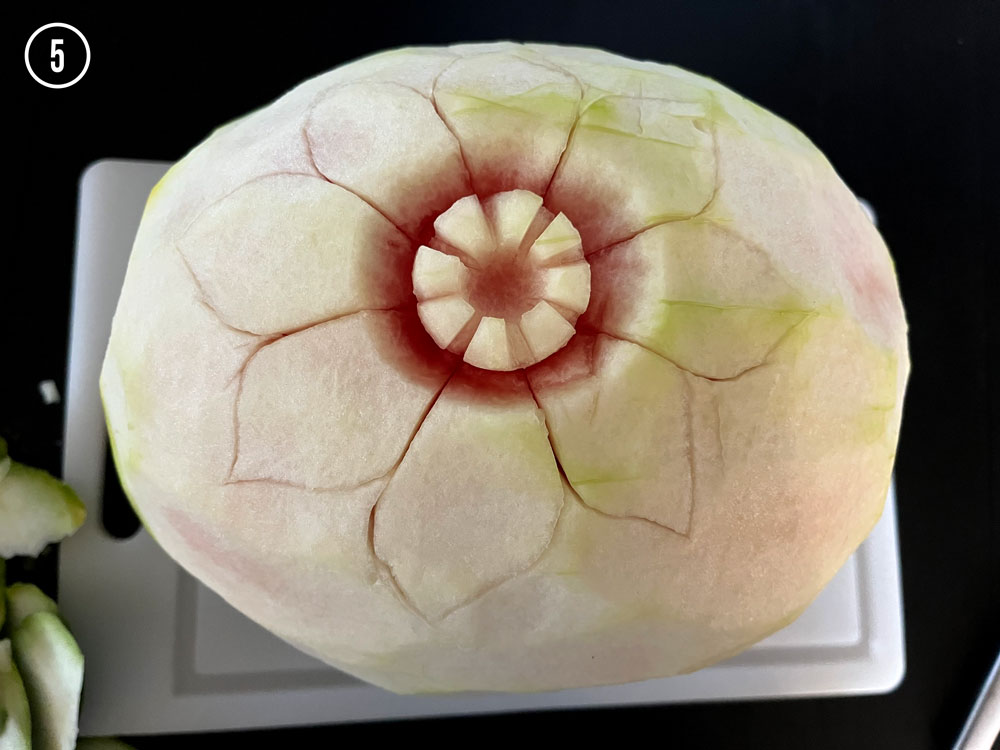
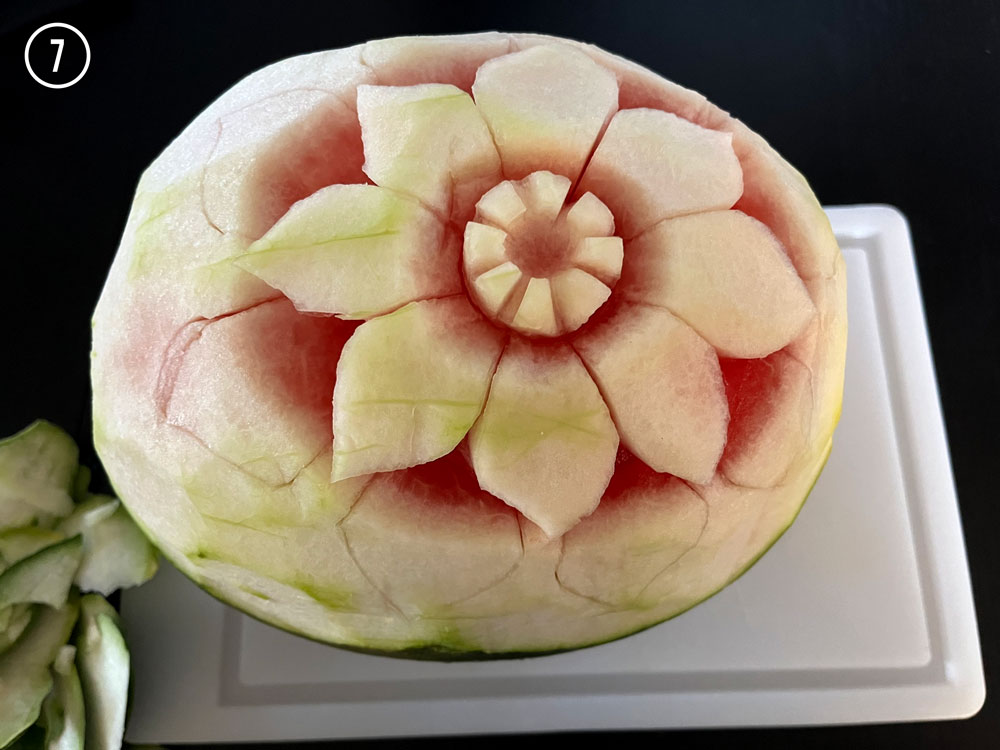
From each indention continue the line outward, dividing the surrounding fruit into eight equal parts once again. Slowly and carefully using just the point of a paring knife, connect the division lines at the mid points between them to form petal shapes.
Step 6
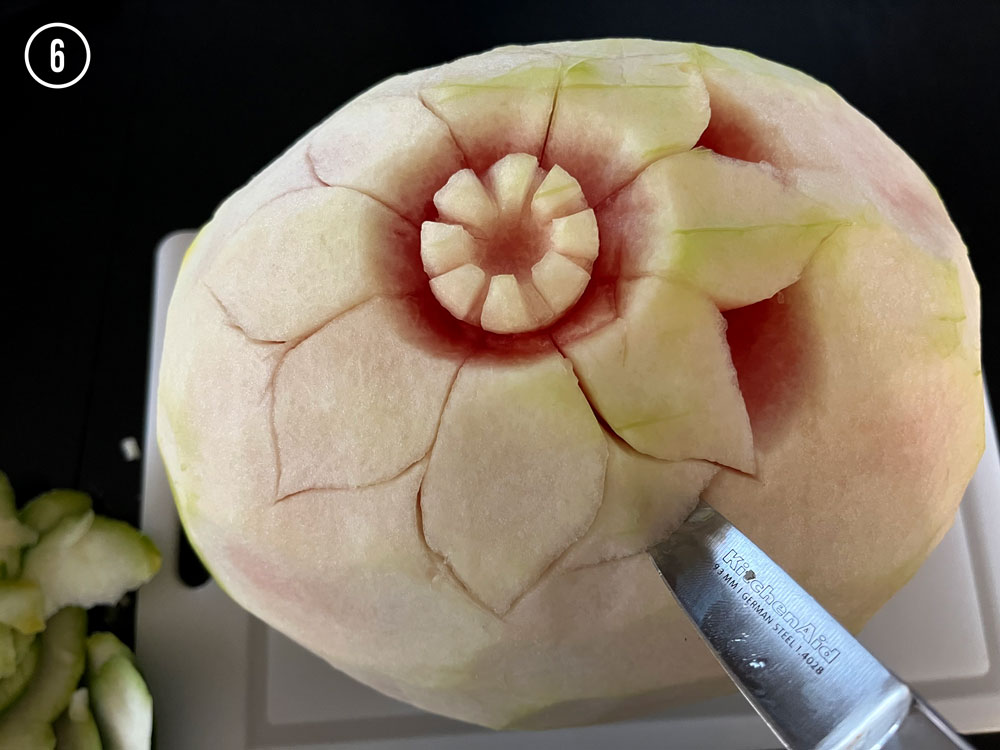
Hold your paring knife at an almost horizontal angle and cut between each petal in a circle, removing the white fruit revealing the red tones beneath. After you have made a rough circle you can even out the edges so that the flower sits in a fully red circle.
Step 7
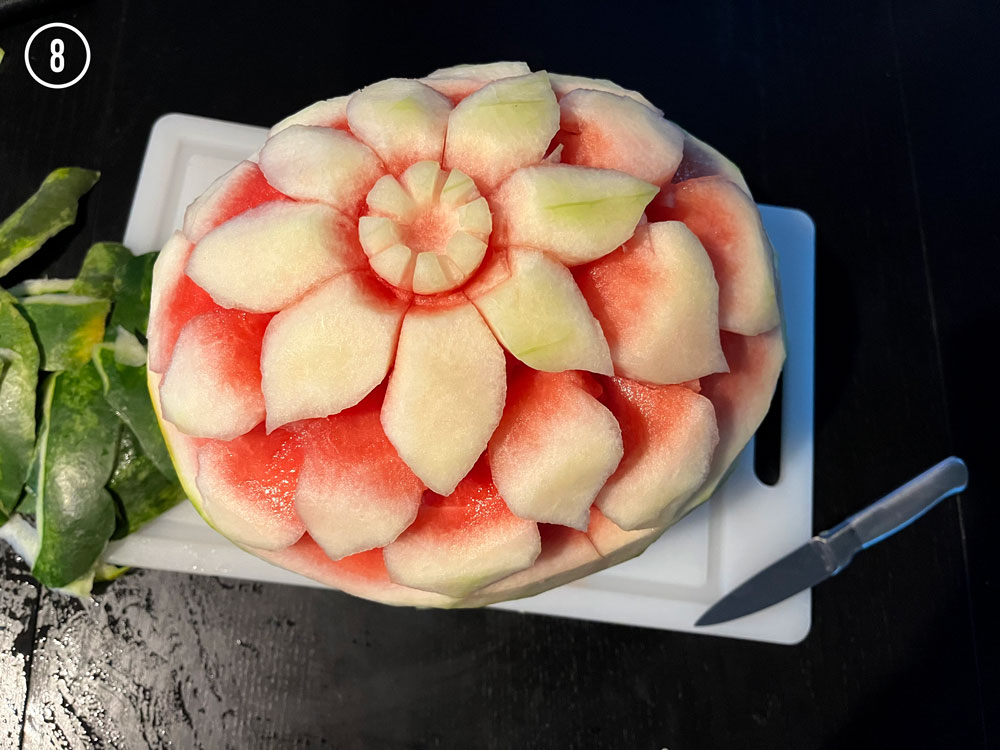
At this point we will simply repeat steps 5 and 6 twice more to create two additional layers of flower petals. Be sure to remove the white fruit between the petals as described in step 6 before moving on to the next layer.
Step 8
Now your watermelon should be looking very flower-like already, but I would recommend going over the petals to trim and sharp edges at this stage to make sure everything has a very rounded form without any hard angles.
Step 9
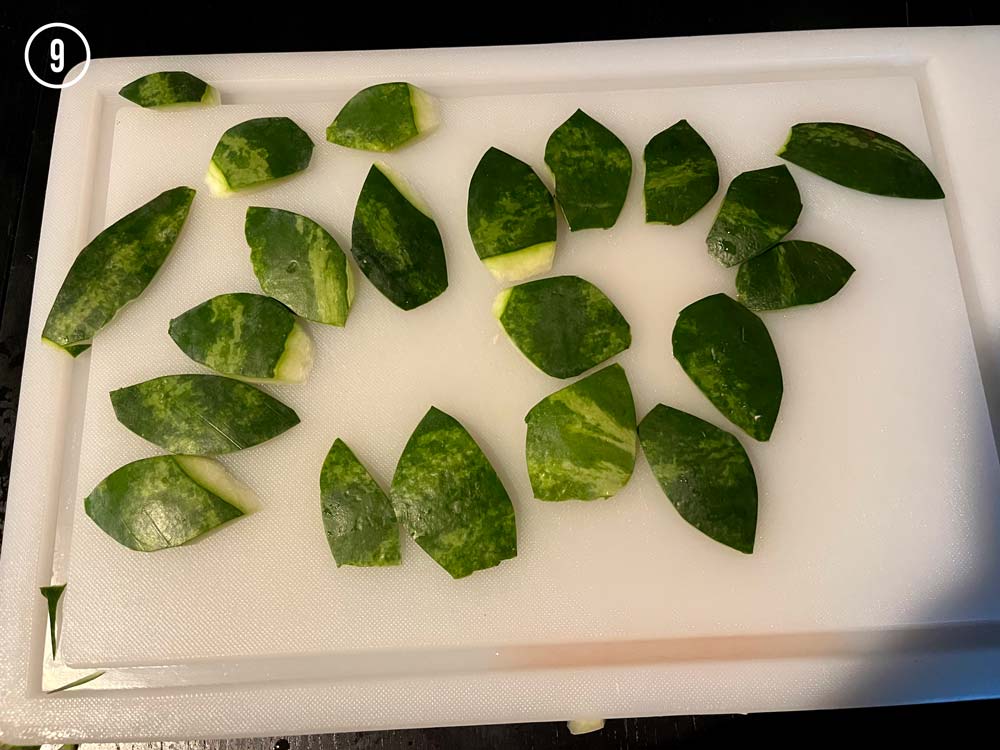
Finally, return to the strips of watermelon rind that you removed earlier and cut them into rough ovals or leaf-like shapes. To really make your leaves pop, carefully cut as horizontally as possible a groove in the center of each leaf (be sure not to cut all the way through) and remove the green skin from the top. Do this again to create 3-4 offshoot grooves from the center of each leaf. Lastly, between each offshoot cut a small triangle
Looking For A Home?
Check out these active listings!
2016 W Lake Drive
$839,000
4 Bedrooms – 4 Full Baths
4,284 Sqft – Built 1983
223 W 22nd Street
$835,000
3 Bedrooms – 2 Full & 1 Half Baths
2,244 Sqft – Built 1998
1730 W 23rd Street
$849,900
3-4 Bedroom – 3 Full & 1 Half Bath
3,545 Sqft – Built 2016


